
The Dodge Paddle Shifter Upgrade Explained
What a paddle swap changes on an automatic Challenger, Charger or Durango, how the mount behind the rim decides the fit, and what to test before the drive home.
Read More →Guide · 10/17/2026
How to fit a Dodge steering wheel safely: isolating the battery, handling the airbag module, marking the spline, and the checks that follow the swap and the details that follow.
Fitting a new rim on a Dodge is a job a careful owner can finish in an afternoon. It is also the job where a rushed hand does the most expensive damage, because the airbag sits in the middle of the work. The sequence below covers the safe order of play.
Two rules sit above everything else on this page. The battery is isolated before a fastener is touched. The centre fastener is then tightened to the figure printed for your car rather than to a number from a forum.
Gather the tools first, then read the procedure for your model once through. The list below is what we suggest for a Challenger, a Charger or a Durango.
An airbag holds enough energy to fire long after the ignition is off. Disconnecting the battery removes the chance of a deployment while your hands are behind the wheel.
On several Dodges the battery sits away from the engine bay, so check your own car before you start. Disconnect the negative terminal first, then wait for the system to discharge as the manual describes. A Dodge steering wheel installation should never begin before that wait is over.
Access usually comes from behind the rim. The side covers pop away, and the retaining clips sit in the openings behind them.
Press each clip with the trim tool and let the module come forward. Never lever against the airbag face, and never pull the module by its wiring. A sharp tug on the loom is how clock springs get broken.
Set the module face up on something soft and away from the work area. Keep it out of direct sun, and do not rest tools on top of it.
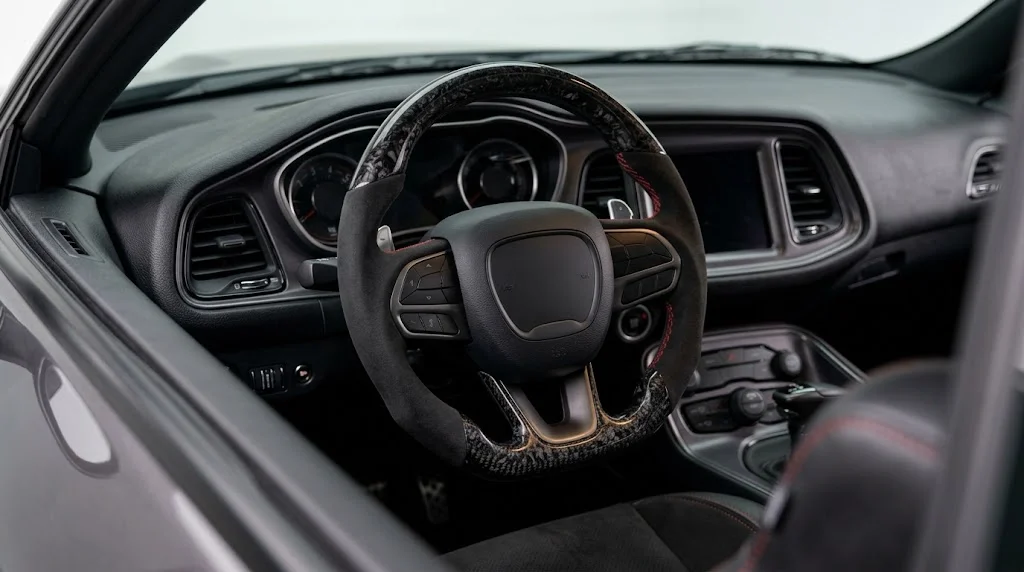
The wheel above shows a finished RYDEMARK rim in a Challenger cabin. The installation steps are the same for a rebuild of your own wheel.
With the module free, release each connector by its lock rather than by the wires. Photograph the layout before you separate anything, because the loom has to go back the same way.
The horn lead is often a single wire with its own clip. The clock spring stays where it is, and turning it by hand is the quickest way to break it.
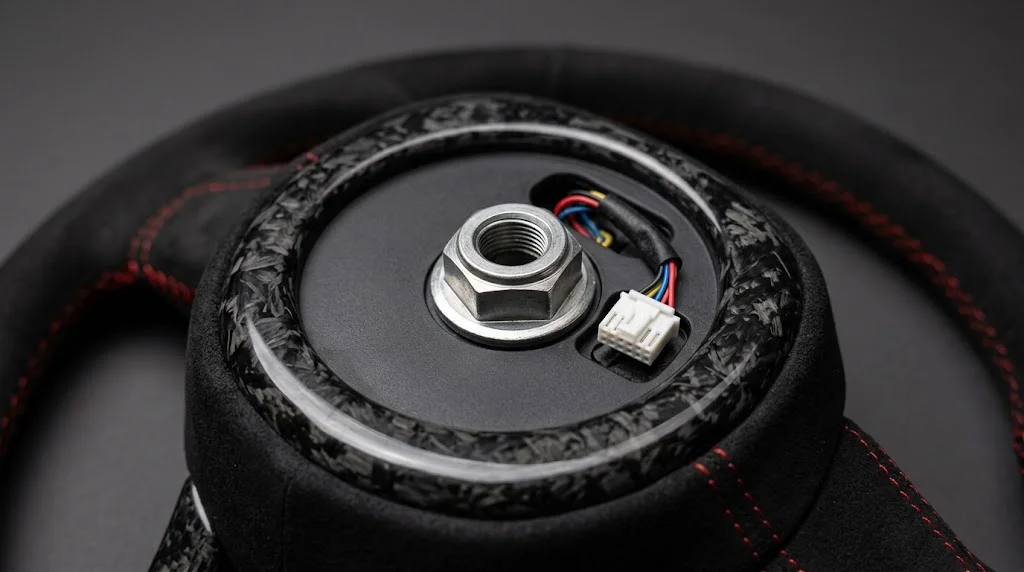
The close-up shows the centre fastener and the connector area behind the airbag. Take this view before anything is loosened.
Marking the spline comes next. A strip of masking tape across the column and the hub, with one pen line over both, records the exact position. That mark is what keeps the rim straight when it goes back on.
Slide the wheel onto the splines with the mark aligned. Do not force it and do not tap it home. A wheel that will not seat has misaligned splines rather than tight ones.
Route the wiring the way it came out, and clip each connector back until the lock clicks. A connector that is not fully seated can still look correct from above.
Where the rim carries a heated mat or a sensing pad, check the routing before the cover goes on. A trapped loom shows up later as a fault that is hard to trace.
The centre fastener has one specified figure, and it lives in the manual for your model. Use a torque wrench rather than judgement, and tighten in a single steady pull.
Do not add thread lock unless the procedure calls for it, and do not reuse a fastener that shows damage. Where the manual lists a replacement nut, fit a new one.
Reconnect the battery negative terminal last, then work through the cabin in a fixed order.
Drive a short distance afterwards and confirm the rim sits straight with the car tracking true. A wheel that is off by one spline tooth shows up within a few hundred yards.
Give the car a second look a week later as well. A connector that was not fully seated often shows itself as a lamp that returns after a few days of driving.
Most harm on this job comes from a short list of habits rather than from the parts. None of them are hard to avoid, and each one takes seconds to prevent.
Some cars should not be started at home. Book the work in when the car is leased, or when the airbag lamp is already lit. A wheel with an unknown history deserves the same treatment.
A workshop also makes sense for a car with hands-on detection or a heated rim. Those builds need the original parts checked before refitting, and a scan settles it quickly.
Four items answer most questions before an order is placed. Send the model, the year and the trim first. Then add a daylight photograph of the wheel face, and one of the rear with the airbag out.
Tell us whether the car is manual or automatic, whether the rim is heated, and whether the spokes carry a performance page button. Those details decide which frame we reuse and how the cover is cut.
Have these ready before you write to us:
Most rim changes reuse the parts already on the car, and the electronics settle back into their usual state. In that case nothing has to be taught to the vehicle.
A different picture appears when the new wheel carries hardware the car never had. The control unit may then need to learn what is present, and a scan becomes part of the job. We treat coding as a possibility rather than a promise, because your car decides the answer.
Three issues come up most often after a swap. The warning lamp stays on because a connector was not clicked home. The rim sits crooked because the spline mark was not followed. The horn stays silent because its single lead was left unplugged.
Frame differences are the fourth issue. A wheel from another Dodge generation can share the badge and carry a different button frame or airbag cover. That is why the fitment check happens before the order rather than after the parcel arrives.
Careful owners can, and many do. The work needs a torque wrench, patience with the clips, and the printed procedure for your car.
A first attempt usually runs to two hours. Someone who has done a few will finish in under an hour.
Not where the connectors are seated correctly and the battery went back last. A lamp that stays lit means the car needs a scan.
Only where the manual for your model asks for them. A damaged fastener should always be replaced.
Yes. A Dodge steering wheel installation cannot be done around the module, and prising at the cover risks both the airbag and the trim.
Many will, and they usually want to see the frame and connectors first. Ask before booking the slot.
Ten to fifteen working days in production, then fifteen to twenty days for shipping. Expect twenty-five to thirty-five days from order to delivery.
Every rim is made after your order arrives, in the Guangzhou workshop our own team works in. Thirteen or more years of design, engineering and precision manufacturing sit behind the patterns we hold. The frame is matched to your car before any cutting begins.
Surface, stitch and shape stay your decisions. Orders ship tracked worldwide with a three-year warranty and thirty days for returns via an RMA request. The fitting questions that come up are answered by the same team that makes the wheel.
Two guides cover the ground either side of this one. The gloss versus matte carbon comparison explains how the two coats age. The Dodge material guide weighs carbon against Alcantara and leather.
The full range sits in the shop, and the Dodge pages are Dodge fitment, the Challenger listing and the Charger listing.
Start with the car you drive and the work you plan, then add the year, the option list and the two photographs. We will reply with a confirmed build and a date before your Dodge steering wheel installation begins.
The catalogue holds two entries for these cars. The first is the bright forged carbon wheel listed for the Charger SRT with LED shift lights. The second is the forged carbon wheel for the Charger and Challenger SRT. Both reuse the switches your car already has, which keeps the installation simple.
For background reading, the installation guide covers the battery and airbag sequence, and the FAQ collects the questions owners raise most. The about page describes the workshop, and fitment or delivery questions can go to the contact page. Lead times are listed in the shipping policy, and returns fall under the return and refund policy. The Magnuson-Moss Warranty Act sets the federal minimum standards, and the Code of Federal Regulations carries the related warranty rules. Fitment questions can go through the inquiry form.
A Dodge steering wheel installation that ends with a quiet warning lamp is the goal. A lamp that stays lit means the car should be read before the next drive rather than at the next service.
What a paddle swap changes on an automatic Challenger, Charger or Durango, how the mount behind the rim decides the fit, and what to test before the drive home.
Read More →How to clean carbon fiber and Alcantara on a Dodge steering wheel: a ten minute routine, the cloths to use, and the products that damage both surfaces.
Read More →How gloss and matte carbon behave on a Dodge steering wheel: which finish suits a Challenger, Charger or Durango, and how each one ages in the sun.
Read More →